-
1. Download and launch our installer RuntimePE.exe.
-
2. By default, the installation folder for LSP is C:\RuntimePE. Click "Install LSP" to begin the installation.

RuntimePE: Installing LiveSystem Pro and Runtime's plugin.
-
3. Let the installation run its course. It should not take longer than a minute.

RuntimePE: LiveSystem Pro and Runtime's plugin were successfully installed.

c:\RuntimePE: LSP
After successful completion, LSP and the plugin have been installed in C:\RuntimePE. The plugin RuntimeSoftware.srt has been copied into the Apps folder under the four projects, WinXPE, Win7PE, Win8PE, and Win10PE.

Shortcut: LSP
A shortcut to LSP has been created on the desktop. Later, you can click on this shortcut to launch LSP.
Now click on "Start LSP" to close the installer and launch the LiveSystem Pro environment.
-
4. Upon startup, LSP looks for active anti-virus software. It is recommended that you disable your security software while creating the PE Boot Medium as it can interfere with some LSP tasks.

LSP: Active protection warning
-
5. You are greeted by the LSP main screen. Let's get started:
▶ Select the Windows version, e.g. "Win10/Win11".
▶ Set the "Source". Click on the three dots and navigate to the location of your installation DVD. If you inserted the DVD into drive E:, this is your "Source". The source LED must turn from red to green (see screenshot in step 7). If it does not, you have not correctly set the source to the Windows installation folder yet.

LSP: Main screen
-
6. Skip this step if you already set the source in step 5 and go to step 7. If you do not have a Windows installation DVD at hand, you can download a Windows installation ISO file from Microsoft.
Within the "Download ISO" box on the LSP main screen, click the Windows version you want to download, e.g. "Windows 10". A link to Microsoft's Media Creation Tool will be opened and downloaded by your browser.
Start the downloaded program, e.g. MediaCreationTool_22H2.exe, and follow the on-screen instructions to "Create installation media ... for another PC".
Select the ISO option and download the ISO file into the LSP base folder, c:\RuntimePE. After the download is complete, mount the ISO by right-clicking the file and selecting "Open with..." and then "Windows Explorer". Take note of the drive letter the installation ISO was assigned to, e.g. F:.
Return to step 5 above and set the "Source" to the drive letter assigned to the mounted ISO (F: in our example).
-
7. Click on the plus sign to open the Apps folder, then select the Runtime Software ALL plugin. On the right side, you can see the available software titles. Make sure Runtime Software ALL has a check mark in the left folder panel. Select all programs you want to include in the PE Boot Medium on the right side.
Programs requiring a license key for the full version have a red LED next to them. You can include the license key by clicking on the LED and typing in the license name and key. This makes the activation of the software persistent. You can also enter your license key after booting from the PE Medium. In that case, the activation will be lost after shutdown.
The "Download each time" field causes LSP to download the installation files for our software each time you run LSP. This is not advisable as an update method because updated software will have a different checksum and may therefore be refused by the plugin. If you wish to upgrade the PE Boot Medium with the newest versions of our software, you need to download and run a new version of our installer RuntimePE.exe.

LSP: Runtime Software's plugin
-
8. Click on the plus signs to open the Finish and the Virtual Test folders. These contain the actions LSP will take after it has assembled the boot image.
▶ Create ISO: An ISO will be created. This ISO can be used to burn physical CDs, create bootable USB drives, and boot virtual machines.
▶ Create USB: A USB stick will be written.
▶ BestEmu: A virtual machine will be started with the created ISO if an emulator is available. This is a great way to quickly test the created ISO file before writing it to a CD or USB stick.

LSP: Configure After Finish Action
Click the "Start" button to begin the creation of the WinPE Boot Medium. If you get an active security software warning again, you should disable it now. The following process can take anything from 5 to 30 minutes, depending on the amount of data LSP needs to download.
-
9. Once you see the message "Starting PE2Usb", switch to the window titled "LSP PE2USB". Here you will write WinPE to a USB drive. You can use any USB stick with a capacity between 1 GB and 32 GB. Please be careful here as the destination drive will be overwritten. In our example we inserted a 1 GB USB stick that was assigned the drive letter F:.
Click "Transfer" after you have verified that the target drive F: is in fact the USB stick you intended to use for this purpose. After the transfer finishes, close the program and go back to LSP.

LSP USB Tool: Write WinPE to a USB stick
10. Congratulations! You have created a WinPE Boot Medium. You can now remove the USB stick and try it out. The ISO file is located in the folder c:\RuntimePE\Iso. If you need additional USB sticks, simply run the LSP USB tool again. You can also run other software that transfers the ISO to a CD or USB drive.
If you like LiveSystem Pro, please consider making a donation!

LSP: If you like this software – donate!
-
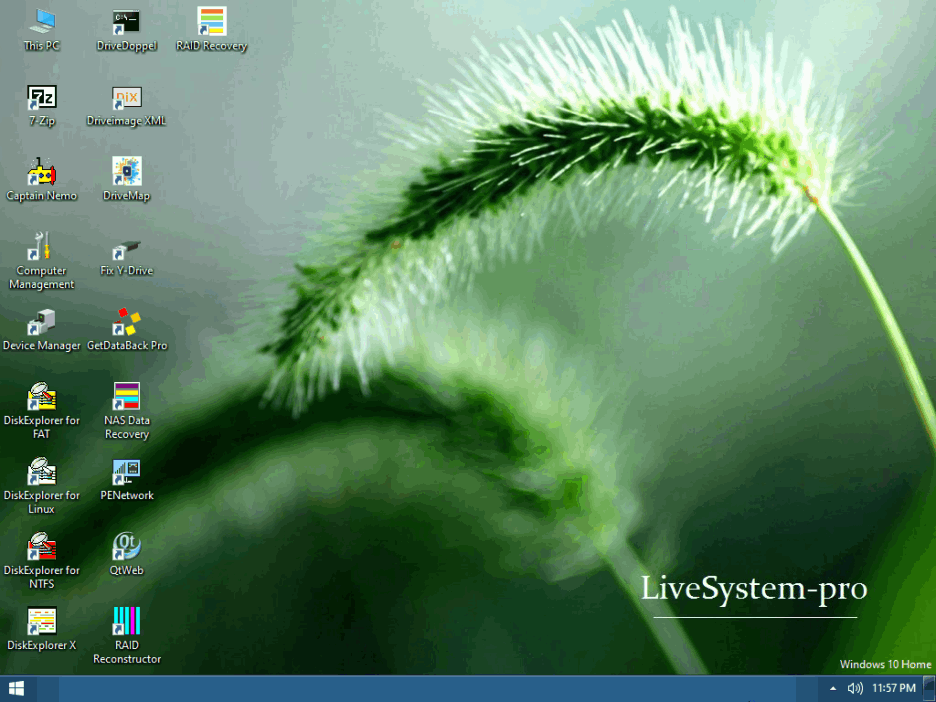
11. Boot your machine from the newly created CD or USB stick. The desktop should look like this:

WinPE: Desktop with Runtime Software programs